Part 3 of a series on what I learned shipping BaseballScorer. Part 1 was the arc; Part 2 was the release workflow and the skills that mechanize it. This one is about memory — and more broadly, about the question every Claude Code user ends up arguing about: what goes in the context window, what goes in CLAUDE.md, what goes in persistent memory, and when to clear the whole thing and start fresh.
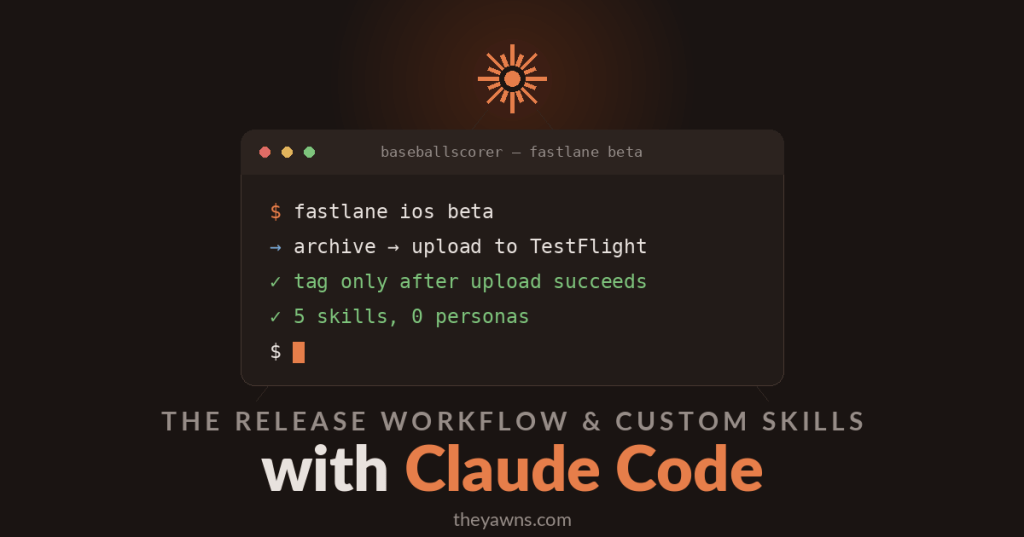
In late June, Apple’s upload API lied to me. I ran my TestFlight release lane, the build uploaded, and then fastlane reported a failure — a 500 “internal server error” from something called ASSET_SPI. The natural move is to retry the upload. I did, through Apple’s Transporter app, and Apple rejected the retry as a duplicate: the build was already there. The 500 hadn’t been the upload failing. It was Apple’s status check failing after the upload had already succeeded. The error was, not to put too fine a point on it, a lie — and figuring that out cost me a chunk of an evening.
Here’s the part that matters for this post. Two weeks and three releases later, that lesson was still operative. Every subsequent release, the assistant flagged it unprompted: if the lane reports an ASSET_SPI 500, don’t re-upload — verify whether the build actually landed first. I never re-explained it. I never re-derived it. A war story from June was still standing guard in July, across dozens of fresh sessions, each of which started — as every Claude session starts — knowing absolutely nothing about me or my project.
That’s what a memory system buys you. But “use memory” is not actually the interesting advice, because every AI-assisted developer I talk to is wrestling with a more tangled set of questions: How often should I clear my context? Does compaction make the model dumber? Should CLAUDE.md be lean or loaded? What’s the actual difference between telling Claude something in the prompt, putting it in CLAUDE.md, and saving it to memory? People have strong opinions about all of these, usually derived from one bad experience and generalized into doctrine.
So this post is my attempt at a working mental model — the one that’s held up across three-plus months and five TestFlight-and-App-Store releases of BaseballScorer. It’s not doctrine. But it’s been load-tested.
The memory hierarchy
If you’ve been an engineer for more than about a week, you already know this shape: registers, cache, RAM, disk. Small-fast-expensive at the top, big-slow-cheap at the bottom, and the whole game is putting each piece of data in the right tier.
Working with Claude Code has exactly this structure. Four tiers:
Tier 1: The conversation context. This is working memory — everything said and done in the current session, including the contents of every file Claude has read. It’s the most powerful tier, because everything in it directly shapes what the model does next. It’s also finite, expensive, and it decays (more on compaction in a minute). Crucially, influence cuts both ways: stale or wrong material in context doesn’t sit there neutrally. It competes with the truth.
Tier 2: CLAUDE.md. Standing orders. This file is loaded at the start of every session, which makes it the most expensive durable real estate you own — every line you put here is a line Claude reads before every single task, forever. It’s also checked into the repo, which turns out to matter more than it first appears.
Tier 3: Persistent memory. The judgment journal. In my setup this is a directory of small markdown files plus an index — the index is loaded every session (like CLAUDE.md, but for accumulated lessons rather than standing orders), and the detail files are pulled in only when relevant. This is where the ASSET_SPI story lives.
Tier 4: The repo itself. Ground truth. The code, the docs/ directory, the git history, the test suite. Effectively unlimited, fully durable, shared with every collaborator — and, critically, verifiable. Claude can read it fresh anytime and trust what it finds, because it’s not a note about the code; it is the code.
And the rule that organizes everything — if you take one sentence from this post, take this one:
Push every fact down to the cheapest tier that preserves it, and treat the conversation as disposable.
If losing your context window right now would hurt, something important is living in the wrong tier. The conversation is where work happens, not where knowledge lives. The moment something in a session turns out to be durably true — a gotcha, a decision, a preference — it should flow downward: into memory, into CLAUDE.md, into a doc in the repo, wherever it belongs. What remains in the conversation should be only the work in progress.
Baseball version, since this is nominally a baseball-app series: the conversation is what’s in the scorer’s head during the play. CLAUDE.md is the ground-rules card taped inside the scorebook. Memory is the scorebook itself. The repo is the rulebook and the league’s official records. Nobody tries to keep the whole season in their head, and nobody should have to reread the rulebook to remember that the ballpark has a short porch in right.
With the model in place, let’s take the contested questions one at a time.
When should you clear the context?
Liberally, and specifically: between unrelated tasks.
The instinct to preserve a long-running conversation comes from a reasonable place — the model feels smarter mid-session, because it has all that context. And it genuinely is, while the context is relevant. The problem is what happens when you pivot. Finish a gnarly print-layout investigation, then start a networking feature in the same session, and all that layout reasoning is still sitting in working memory. It isn’t neutral filler. It’s noise with authority — hundreds of lines of intermediate hypotheses, half of which were wrong (that’s what investigation is), all still whispering to the model while it tries to think about something else.
Old context doesn’t just waste space. Wrong-but-confident material in context is precisely the raw ingredient hallucinations are made of. The model has no typographic marker distinguishing “conclusion we verified” from “hypothesis we abandoned twenty minutes ago”; both are just tokens it once said.
The discipline that makes clearing cheap is the push-down rule. When the print investigation concluded, the conclusion — “the scorecard print is height-bound, not width-bound; future size complaints should target row heights, not column widths” — went into memory. Two sentences. The eight hundred lines of measurement and dead ends that produced those two sentences got thrown away with the session, unmourned. Next time print size comes up, the two sentences come back and the dead ends don’t. That’s not lost information; that’s distilled information.
If clearing your context feels scary, that fear is diagnostic. It means knowledge is trapped in tier 1 that belongs in tier 3 or 4. Fix the filing, and the fear goes away.
Does compaction hurt accuracy?
Some. Here’s the mechanism, because knowing why tells you what to do about it.
When a session runs long, the harness compacts it: older conversation gets replaced by a summary. Summarization is lossy in a very particular way — it preserves narrative and drops precision. “We fixed the auto-advance bug and merged to main” survives compaction beautifully. The exact tag name, the specific line number, the precise flag that carried the fix — those are exactly the details a summary rounds off.
So the practical rule: after a compaction, trust the story, re-verify the specifics. If post-compaction work depends on an exact value — a version number, a build setting, a function signature — the move is to look it up fresh from the repo (tier 4), not to trust the summary’s recollection of it. Ground truth is one file-read away, and unlike the summary, it can’t have rounded anything off.
I can offer this series itself as evidence. These posts have been written across many sessions with the same assistant, through multiple compactions, spanning weeks of feature work in between. The continuity you’re reading — callbacks to Part 2’s war stories, the running motifs — survived not because the context window is heroic but because everything load-bearing lives in files: the draft posts themselves, a memory note tracking the series plan, the repo’s docs. The conversations were disposable, so losing detail from them cost nothing. The hierarchy is what makes compaction survivable, the same way it makes clearing safe. They’re the same insurance policy.
How much belongs in CLAUDE.md?
Less than you’re putting there, probably — but the reason matters more than the rule.
Every line of CLAUDE.md is read at the start of every session, before every task, for the life of the project. That’s its superpower and its cost. The budget question for any candidate line is: does this change Claude’s behavior often enough to justify being read every single time?
Things that clear that bar, from my actual file: the exact build and test commands (with the environment-variable gotcha that makes them work on my machine); the instruction to read the workflow doc before non-trivial work; the warning to never edit the Xcode project file directly while Xcode is open, because that way lies corruption; a note that a particular category of tooling is unreliable for builds so use the command line instead. Every one of those redirects behavior on a large fraction of tasks. They’ve each paid their rent many times over.
Things that don’t clear the bar: architecture narratives, feature history, aspirational coding standards nobody consults, and anything that reads like documentation. The tell is exactly that — if a section reads like documentation, it is documentation, and it belongs in docs/ with a pointer. My CLAUDE.md doesn’t contain my branching and release policy; it contains one line saying “read docs/workflow.md before starting non-trivial work.” The policy lives in tier 4, where it’s versioned, diffable, and readable by humans too. CLAUDE.md just makes sure Claude knows the pointer exists.
So in the great “edit down vs. fill up” debate: edit down, but not out of minimalist aesthetics — out of budget discipline. It’s the most expensive real estate you own. Spend it on behavior, link to everything else.
Memory vs. CLAUDE.md vs. the prompt
This one has the cleanest answer of the bunch, and it comes down to scope and authorship.
CLAUDE.md is checked into the repo. That makes it true-for-anyone: any collaborator, any future contributor, any other agent that clones the project gets the same standing orders. It describes how to work in this codebase. It’s also curated deliberately — you edit it the way you edit code, on purpose, in commits.
Memory is specific to a collaboration. Mine holds things that would be presumptuous or meaningless in a checked-in file: my preferences (I want a high bar for what earns a point release; I’m skeptical of elaborate persona prompts), corrections I’ve issued and why, the current state of in-flight work (“build 31 is on TestFlight awaiting tester assignment”), lessons that encode judgment rather than procedure. It accrues conversationally — “remember this” mid-session — rather than being edited like a source file. If CLAUDE.md is the ground-rules card, memory is the relationship.
The prompt is for this task only. Anything you find yourself typing into prompts repeatedly is a filing error — it’s a durable fact living in the most ephemeral tier, at the cost of your typing it forever. Promote it: repo-truths into CLAUDE.md, collaboration-truths into memory.
The taxonomy of what earns a memory slot, from three months of practice — three categories carry nearly all the value:
- Corrections, saved with the why. Not “don’t edit project.pbxproj directly” but “don’t edit it while Xcode is open, because external edits can corrupt Xcode’s in-memory state — ask me to make the change in the Xcode UI instead.” The why is what lets the lesson generalize instead of becoming a cargo-cult rule.
- Validated approaches. When something works and we confirm it worked, that’s as valuable as a correction. The best example from this project: Siri integration silently failed with one Apple API pattern and worked with another (Part 2 readers will remember the AppEnum saga). The memory doesn’t just say which one won; it says what the failure looked like, so the next occurrence gets recognized in minutes instead of hours.
- Project state that isn’t in the code. What shipped in which build, what’s awaiting whose decision, what the tester feedback said. Git knows what changed; it doesn’t know what we’re waiting on.
And one anti-category: never save what the repo already records. A memory that duplicates the code is a stale copy waiting to mislead. If Claude can look it up in tier 4, it should — which brings us to the sharpest knife in the drawer.
Memory is not live state
Here’s the discipline that separates a memory system that compounds from one that slowly poisons you: a memory is a point-in-time observation, not a fact about the present.
Code moves. Files get renamed, functions get refactored, flags get removed. A memory that says “the fix is the flag on line 600 of such-and-such service” was true the day it was written and gets falser every week. The rule we run: when a memory names a file, a function, a line, a setting — verify it against the current repo before acting on it. The memory’s job is to point; the repo’s job is to be true.
This is the same principle as the compaction rule, and it’s worth saying why: stale information is worse than no information, because it arrives wearing the costume of authority. A model with no memory of your build system will go read the config and get it right. A model with a confident eight-week-old memory of your build system may not think to check. The failure mode of memory isn’t forgetting — it’s remembering wrong, fluently.
Two small hygiene habits fall out of this. First, absolute dates: a memory that says “last Tuesday” is gibberish in a month, so relative time gets converted to real dates at save time. Second, aggressive pruning: when a memory turns out to be wrong or obsolete, it gets deleted, not annotated. Memory is a working set, not an archive — the archive is git.
The payoff: judgment that compounds
Part 2 argued that skills turn workflows into things that happen the same way every time. Memory does the same thing one level up: it makes judgment repeatable. Every war story costs you once and then pays dividends forever — but only if the distillation is good. Three examples from just the past two weeks of BaseballScorer work, because recency is the point:
The ASSET_SPI lie you already know. One bad evening in June; every release since has carried the antidote in its pocket.
The print investigation ended with a two-sentence memory — “height-bound, not width-bound; target row heights” — that converts every future “can the print be bigger?” request from an afternoon of measurement into a thirty-second answer.
Best of all, the batting-around bug. A live game exposed a display bug: when a team bats around, a player can reach base twice in one inning, and any code that matched events to players without also checking sequence mixed the two trips together. We fixed the two places it bit us. But the memory doesn’t record the fix — the commit records the fix. The memory records the pattern: any player-keyed scan over inning events breaks under batting-around unless it’s sequence-bounded. That’s a lesson about a whole class of latent bugs, some of which probably exist in code we haven’t stressed yet. When one surfaces next April, the diagnosis is pre-loaded.
That’s the compounding: fixes accumulate in the repo, but pattern recognition accumulates in memory. One is what happened; the other is what to watch for.
Tutorial mode, briefly
The prescriptions, in the spirit of the previous posts:
- Treat the conversation as disposable, and act accordingly. Distill conclusions downward the moment they’re conclusions. Then clear without fear, especially between unrelated tasks.
- After compaction, trust the narrative and re-verify the numbers. Exact values should come from the repo, not from a summary’s memory of them.
- Budget CLAUDE.md like the expensive real estate it is. Behavior-changing lines only; anything that reads like documentation moves to docs/ and leaves a pointer.
- Scope decides the tier. True for anyone in the repo → CLAUDE.md. True for this collaboration → memory. True for this task → the prompt. Typing it repeatedly → you’ve filed it wrong.
- Save the why with every correction, and save validations, not just failures. Both halves of the feedback signal matter.
- Verify memories before acting on them. Point-in-time observations, not live state. Stale-but-confident is the failure mode.
- Prune as aggressively as you save. Wrong memories don’t age into harmlessness; they age into ambushes.
What’s next
The final post in this series is the one I most wish had existed when I started: moving from standalone Claude Code in a terminal to the Xcode-integrated version — what’s different, what’s missing, what to do instead. If this post was about where knowledge should live, that one is about where the assistant lives, and it turns out the answer changes more than you’d expect.
That’s where we’ll leave things for today.
Part of an ongoing series at Nodes and Edges. The app is on the App Store, and the companion scoring guide lives at scoring.theyawns.com.